What is the Cost Range for Accessory Painting? We Introduce Painting Methods and Precautions!

Hello! This is Kakeru Koumuten Co., Ltd.!

Today, I would like to explain about 【accessory painting】!
‘What does accessory painting mentioned in the exterior wall painting estimate refer to?’
‘Is accessory painting really necessary?’
To help alleviate such concerns and questions,
I will introduce the various locations and types of accessories,
as well as the painting methods!

What is Accessory Painting?
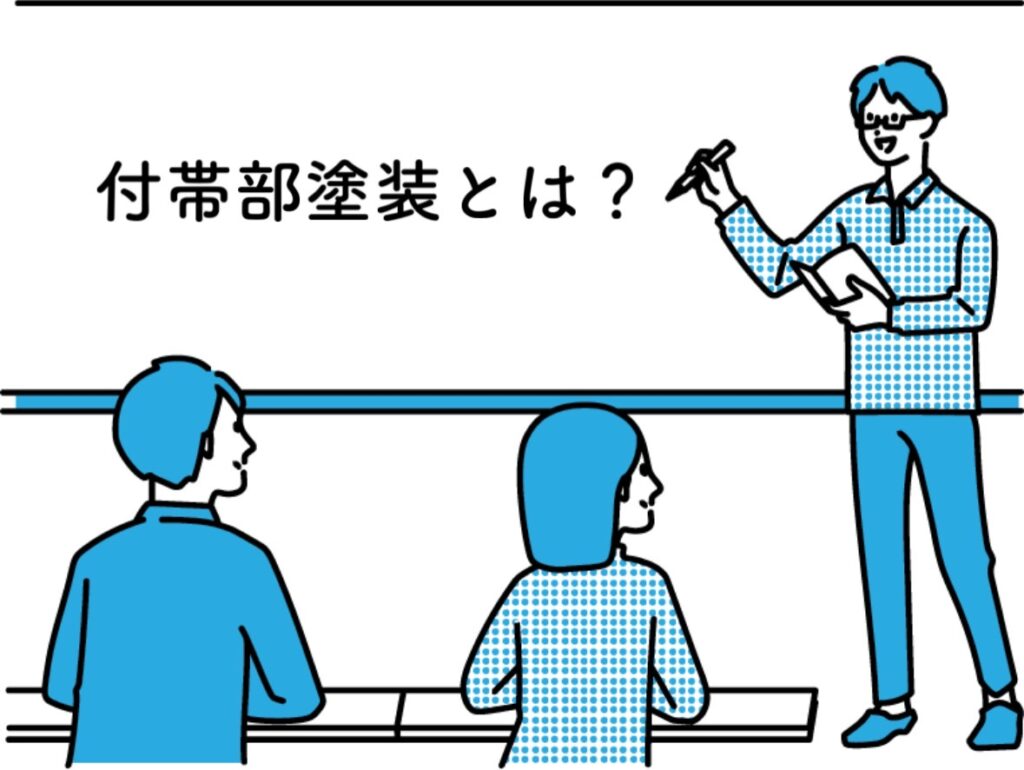
First, accessories refer to parts that are not the ‘walls’ of the exterior wall.
For example, rain gutters, storm shutters, fascia boards, and eaves are collectively referred to as accessories, which are painted separately from the exterior wall!
Some may wonder, ‘Is it necessary to paint the accessories when doing exterior wall painting?’ However, it is common to carry out accessory painting at the same time as exterior wall painting.
Of course, whether to paint or not will vary depending on the condition of the accessories and the types of accessories, so I will introduce the details below.
Types of Accessories
Some may not be familiar with terms like fascia boards and eaves.
First, let me introduce the main accessories below!

The auxiliary parts are diverse, but generally, all parts other than the exterior walls can be considered auxiliary parts. Below, we will introduce the main auxiliary parts.
Roles by Type
The roles of each auxiliary part differ. Below, we will introduce the roles by type.
Rain Gutter

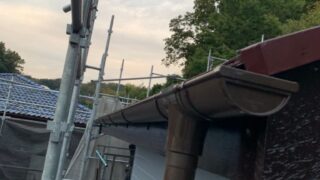
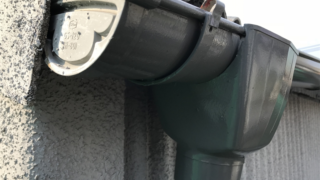
The rain gutter is the part attached to the edge of the roof. The role of the rain gutter is to transport rainwater flowing from the roof to the drainage pipe, preventing deterioration caused by rainwater!
While regular painting can delay deterioration of the rain gutter, if it becomes chipped or cracked, replacement will be necessary. If it is deemed difficult to paint, we will either replace the rain gutter or, if repairs are sufficient, we will paint after the repairs!
Fascia and Soffit
 First, let’s explain the fascia and soffit!
The fascia and soffit are the horizontal boards located at the edge of the roof eaves. The soffit is not easily recognizable, as it is the board located behind the rain gutter!
If the deterioration is severe, painting may peel off quickly, so in cases of severe deterioration, we recommend wrapping the fascia and soffit with Galvalume steel sheet metal.
Soffit Ceiling
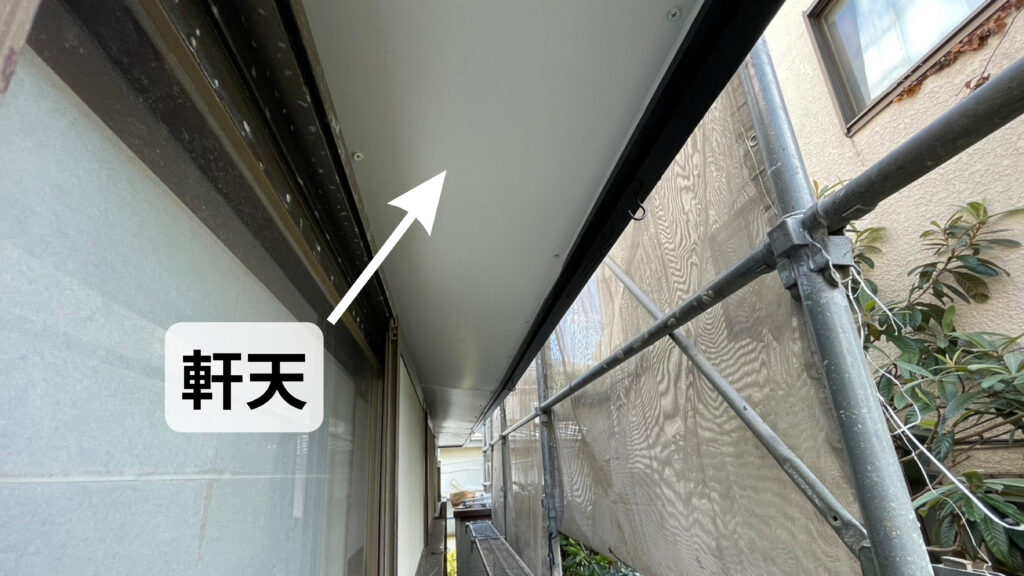
The soffit ceiling refers to the ceiling on the underside of the roof or balcony! The soffit ceiling plays a very important role in preventing the spread of fire and discharging moisture that accumulates in the attic to prevent internal condensation.
Additionally, it helps to reduce direct exposure of the exterior walls to ultraviolet rays and rainwater, serving to delay deterioration caused by ultraviolet rays and rainwater.
Shutters
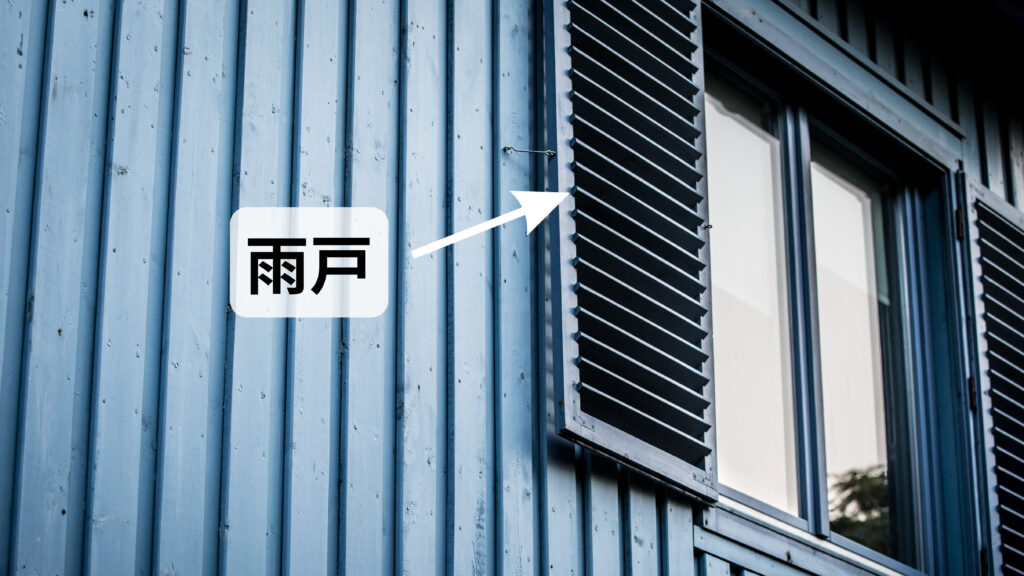
Next, regarding shutters, they serve roles such as security, wind protection, and light blocking. They also protect windows from rain and wind!
Shutters can deteriorate gradually due to strong rain and wind, such as during typhoons.
If you notice fading or chalking, it’s best to perform maintenance promptly.
Frieze Board
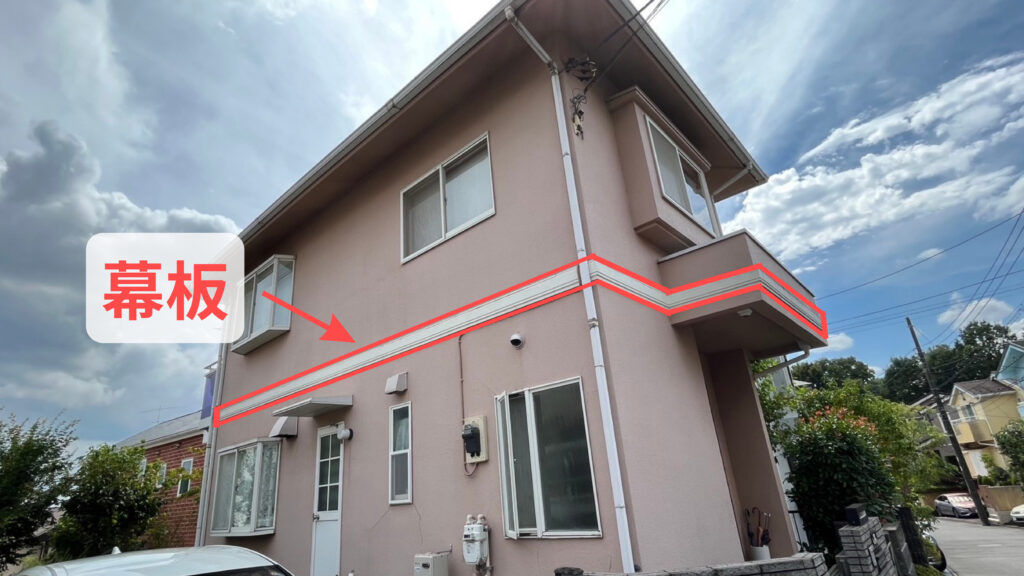
The fascia board, also known as a band, is typically located at the boundary between the first and second floors of a building. (Some homes may not have fascia boards depending on the design!)
The role of the fascia board is said to enhance the aesthetic appearance of the exterior.
The Necessity of Painting Auxiliary Parts

Some may wonder, ‘Is painting auxiliary parts really necessary?’ So, let us introduce the necessity of painting auxiliary parts!
The term auxiliary parts refers to various types of components, but there are some auxiliary parts that should be painted and others that are not urgent.
In particular, auxiliary parts made of wood need protection from UV rays and moisture, while metal parts require painting to prevent rust. Performing maintenance before deterioration progresses is important to reduce future repair costs.
Benefits of Painting Auxiliary Parts
There are many benefits to painting auxiliary parts.
-
Improved Aesthetics: Painting restores the beauty of auxiliary parts, enhancing the overall appearance of the building. This improves the impression of the building and the surrounding area.
-
Increased Durability: Painting protects auxiliary parts from wind, rain, and UV rays, improving their durability. It prevents material deterioration and extends their lifespan.
-
Value Maintenance: Painting helps maintain the lifespan of the building, reducing future repair costs and preventing a decrease in the building’s value at the time of sale.
-
Cost Reduction for Repairs: Early painting maintenance allows for addressing issues before deterioration progresses, reducing repair costs. This helps avoid large-scale repair work.
-
Improved Energy Efficiency: Proper painting enhances insulation performance, improving the energy efficiency inside the building. This also leads to reduced heating and cooling costs.
Auxiliary Parts That Need Painting
Generally, auxiliary part painting is done alongside exterior wall painting, but here are six auxiliary parts that require painting!
Ridge Board
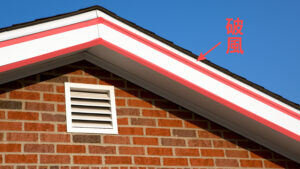
The ridge board is often made of calcium silicate board or wood, so painting is necessary to protect the material. Calcium silicate boards and wood are prone to deterioration, and if left unattended, the wood itself can become damaged, so it is recommended to paint it at the time of exterior wall painting!
Rain Gutter

Most rain gutters are made of vinyl chloride, a plastic material, which makes them vulnerable to ultraviolet rays, and over time, they can become very brittle. To prevent this, regular painting is necessary to protect against UV damage.
If painting alone cannot avoid the issue, a rain gutter replacement will be required.
Soffit
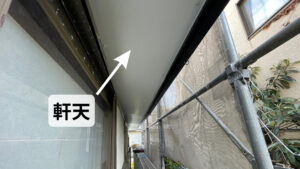
While soffits are not particularly exposed to intense ultraviolet rays, if there are cracks or moss on the soffit, it is best to paint it simultaneously with the exterior wall painting!
If there are stains on the soffit, it may indicate leaks inside, so painting is not recommended.
Vent Hoods and Drip Edges
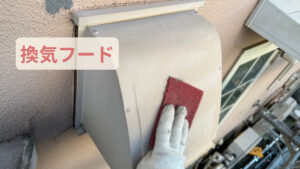
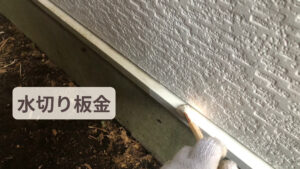
If the vent hoods and drip edges are made of steel (iron), maintenance through painting will be necessary.
Some contractors may overlook drip edges and vent hoods, so it might be a good idea to check if they are included in the estimate or ask the person in charge.
Canopies and Drip Stops
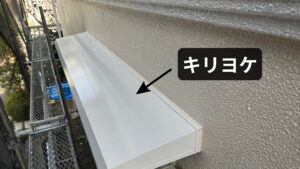
If canopies and drip stops deteriorate, the risk of rust and holes forming, leading to leaks, increases. Therefore, when painting the exterior walls, it may be wise to pay attention to the drip stops and canopies as well.
If canopies and drip stops leak, it can affect the interior of your room, so be sure to maintain them through painting!
Wet Verandas and Wooden Decks
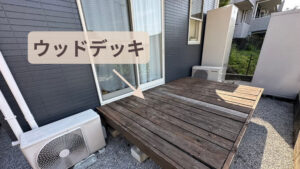
Finally, regarding wet verandas and wooden decks. If they are made of wood, they can deteriorate due to ultraviolet rays and rainwater, so maintenance through painting is necessary.
If you leave the deterioration unchecked without painting, the risk of wood rot and termite infestations increases, so it is recommended to paint them together when doing exterior wall painting!
Notes on Painting Auxiliary Parts
Painting auxiliary parts is an important task to keep the exterior of buildings and structures looking beautiful. Below are some notes on painting auxiliary parts.
-
Pre-treatment is crucial:
- Before starting the painting, it is important to carry out proper pre-treatment to remove old paint, dirt, rust, and cracks. This allows the new paint to adhere more effectively and enhances durability.
-
Choosing the Right Paint:
- Various materials are used for the auxiliary parts, and the suitable paint differs for each. It is essential to select the appropriate paint for materials such as wood, metal, and plastic.
-
Painting Conditions:
- Pay attention to the temperature and humidity when painting. If the temperature is too high, drying may occur too quickly, while if it is too low, the drying of the paint may be delayed. Additionally, excessively high humidity can cause problems with drying.
-
Layering the Paint:
- Typically, it is recommended to apply 2 to 3 layers of paint. This improves the durability of the paint job and results in a uniform finish.
-
Regular Maintenance:
- To prevent deterioration of the paint, regular maintenance is essential. If you notice peeling, cracking, or fading of the paint, it is advisable to request repairs promptly.
By considering these points, you can achieve a beautiful finish and long-lasting durability for your auxiliary part painting.
Process of Auxiliary Part Painting
There is a general flow when performing auxiliary part painting. Below is a brief introduction.
-
On-site Investigation and Assessment: First, an on-site investigation of the building to be painted is conducted. We assess which parts need painting and the degree of deterioration. This helps determine the necessary work and estimate costs for materials.
-
Cleaning: Before painting, the surfaces of the auxiliary parts are thoroughly cleaned. By washing, dirt, mold, and existing paint films are removed, making it easier for the paint to adhere.
-
Surface Preparation: Depending on the material of the auxiliary parts, surface preparation is carried out. For wood, repairs are made to fill cracks and splits, while for metal, rust is removed and the surface is smoothed.
-
Applying Primer: Once surface preparation is complete, primer paint is applied. The primer enhances the adhesion between the paint and the substrate, improving the finish. The type of primer used varies depending on the substrate. For wood, a wood primer (such as wide urethane) is used, and for metal, a rust-inhibiting primer is applied.
-
Painting: After the primer has dried sufficiently, the main painting work is carried out. Different paints are used depending on the type of auxiliary parts, and appropriate layers of paint are applied. The goal is to achieve a uniform and beautiful finish.
-
Finishing and Inspection: Once painting is complete, finishing work is done. Any excess paint or uneven areas are corrected, and a final inspection is conducted to ensure quality standards are met.
-
Cleaning and Removal: After the painting work is completed, the work site is cleaned, and unnecessary materials and waste are removed.
Methods of Auxiliary Part Painting
When it comes to auxiliary parts, the type of paint and construction methods vary depending on the materials used.
Choosing the right paint for the material is crucial to avoid durability issues and post-construction problems. To prevent such issues, we will introduce the painting methods below!
When painting auxiliary parts, be sure to use paint that is suitable for the material.
Additionally, there are materials such as “aluminum”, “resin”, and “copper sheet” that should not be painted, as well as materials like “PVC steel sheet” that require careful selection of paint.
Make sure to have the contractor properly check the materials before receiving paint recommendations.
Calcium Silicate Board Painting Method
Calcium silicate boards are often used for eaves and fascia boards.
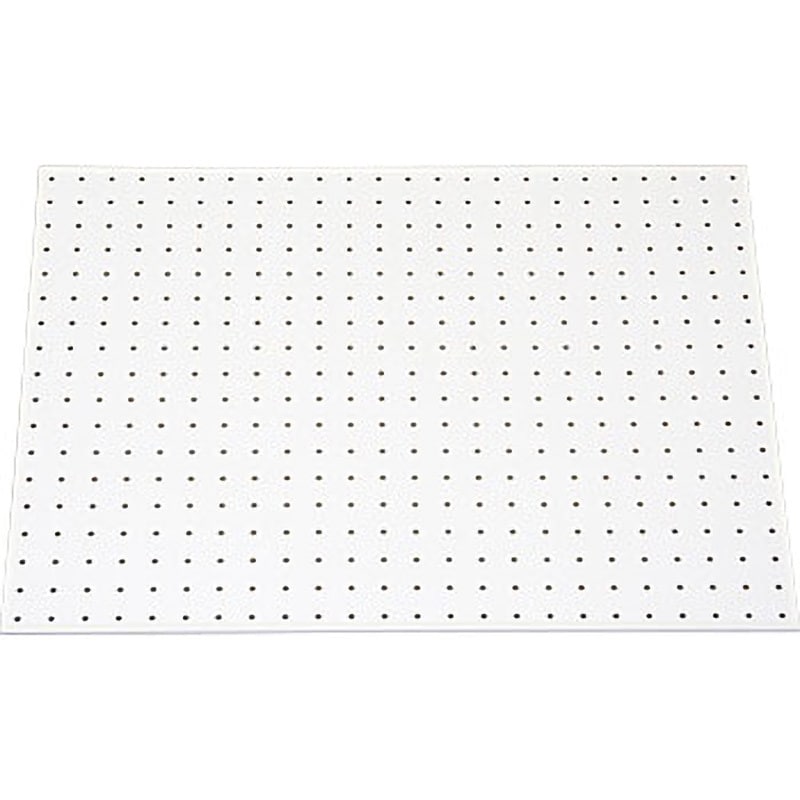
You often see eaves with alternating perforated boards and calcium silicate boards, but since the perforated boards serve a ventilation purpose, make sure to use breathable paint on eaves where perforated boards are used!
Perforated Board☟
【Surface Preparation & Primer】
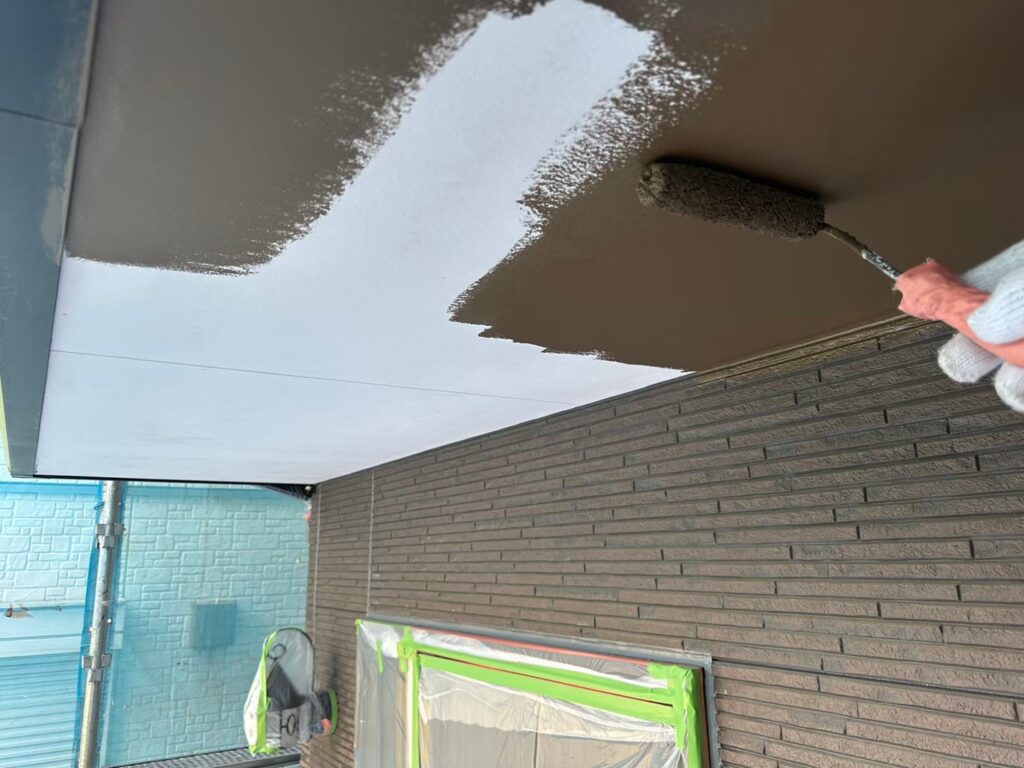
The painting method for calcium silicate boards begins with surface preparation. This surface preparation involves using a scraper to eliminate any surface irregularities.
Once the surface preparation is complete, a primer is applied. This primer is applied to enhance adhesion.
【Top Coat】
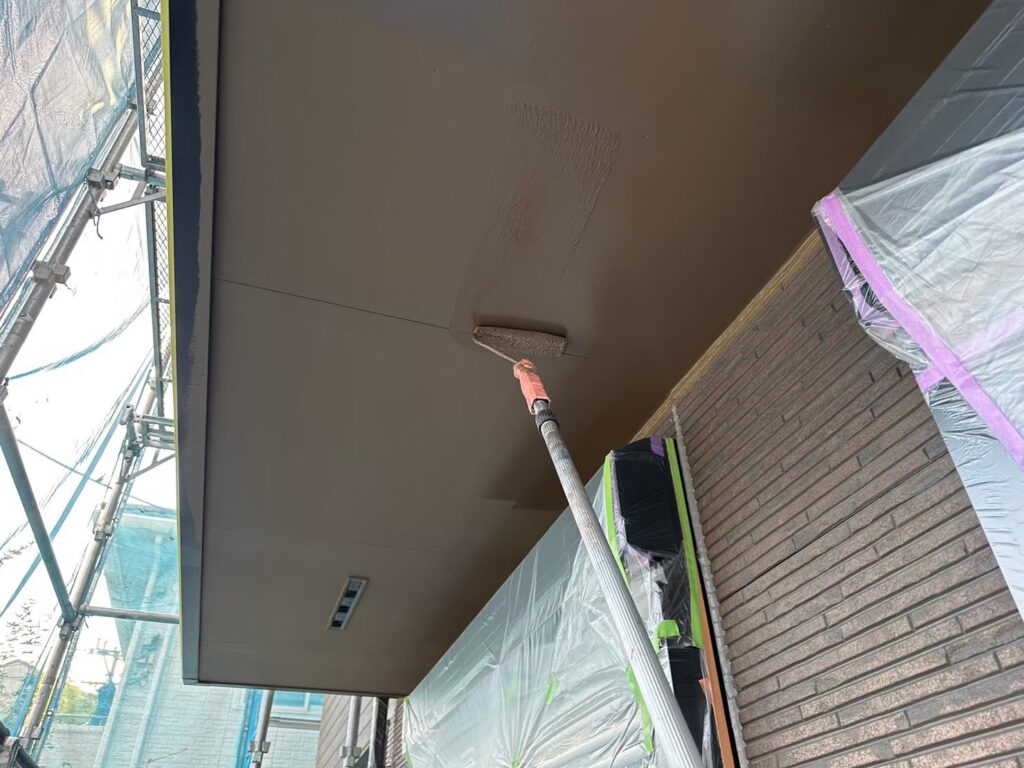
Next, we move on to the top coat. A single coat will create unevenness and won’t result in a clean finish, so we apply the top coat evenly to avoid any patches.
For auxiliary parts, it is standard to apply at least two coats, completing the application with the top coat!
Wood Painting Method
【Surface Preparation】
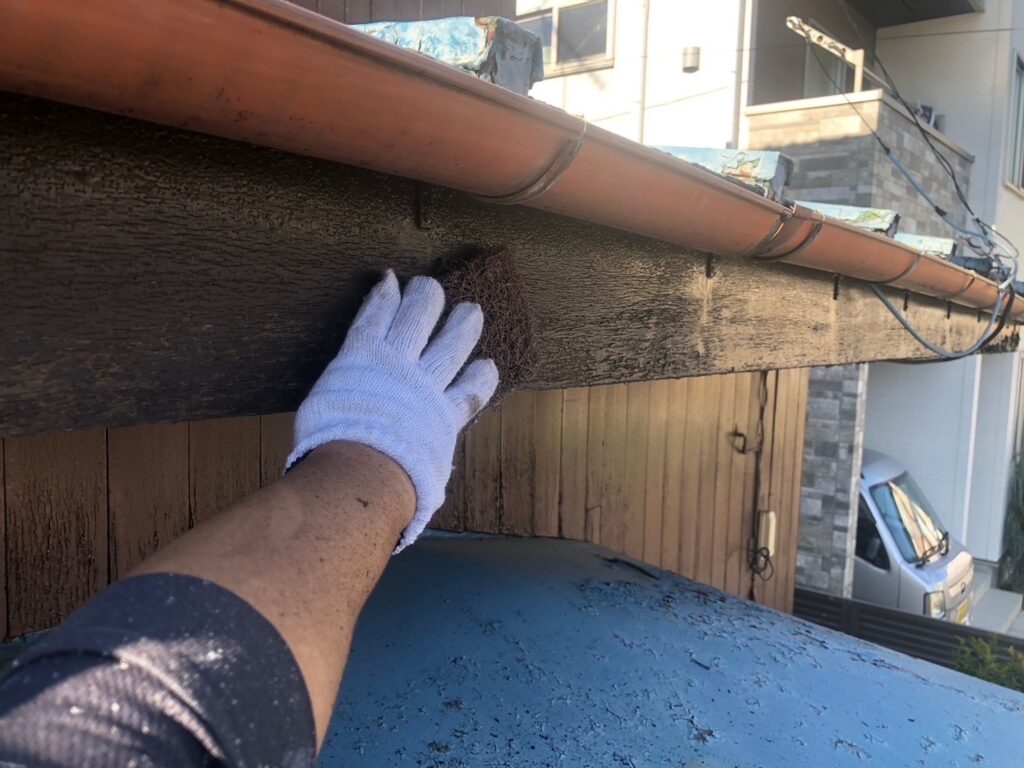
For wood parts, initial surface preparation is performed using a scraper or similar tool. This surface preparation involves carefully removing any peeling paint.
If this surface preparation is neglected, even if you repaint, the old paint layer may peel off along with the new coat, resulting in the need for redoing the work, so it is crucial to perform thorough surface preparation!
【Primer】

Once the surface preparation is complete, we move on to the primer application! The wood after surface preparation tends to absorb paint easily and can become uneven.
If you want to highlight the wood grain, use a penetrating oil-based paint, and if you want to cover the wood grain, use a film-forming water-based type!
The product used in this photo is a wide urethane specifically for wood primer!
【Intermediate Coat】
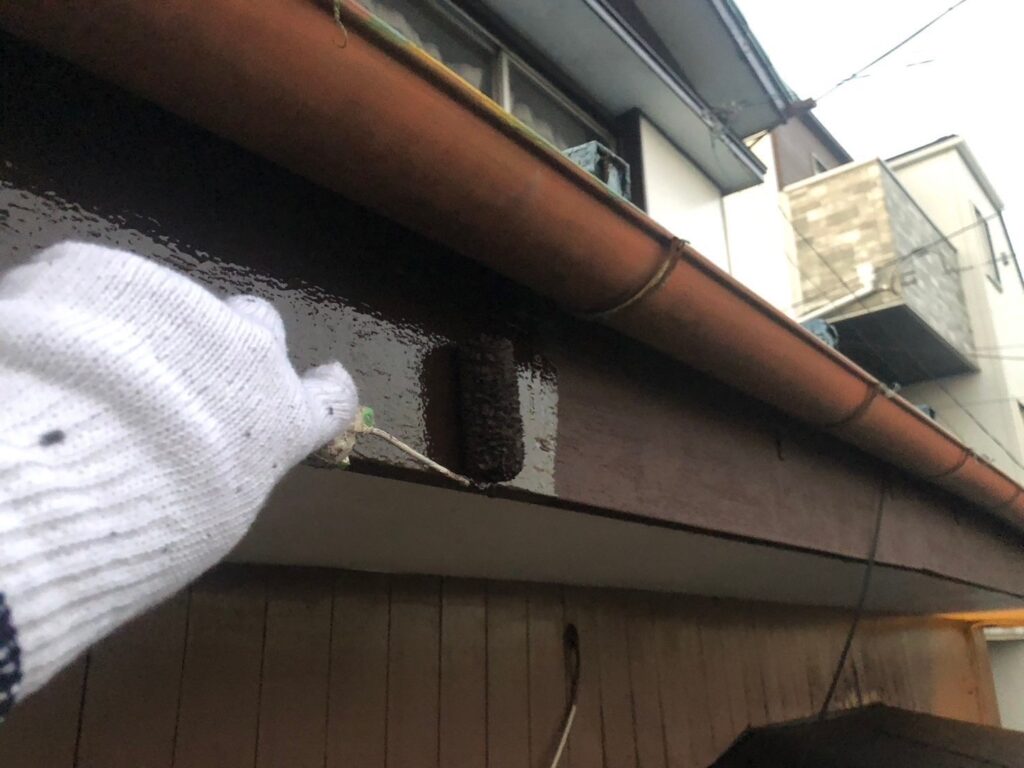
After the primer is complete, we move on to the intermediate coat.
We apply this intermediate coat with the intention of eliminating any unevenness.
【Top Coat】
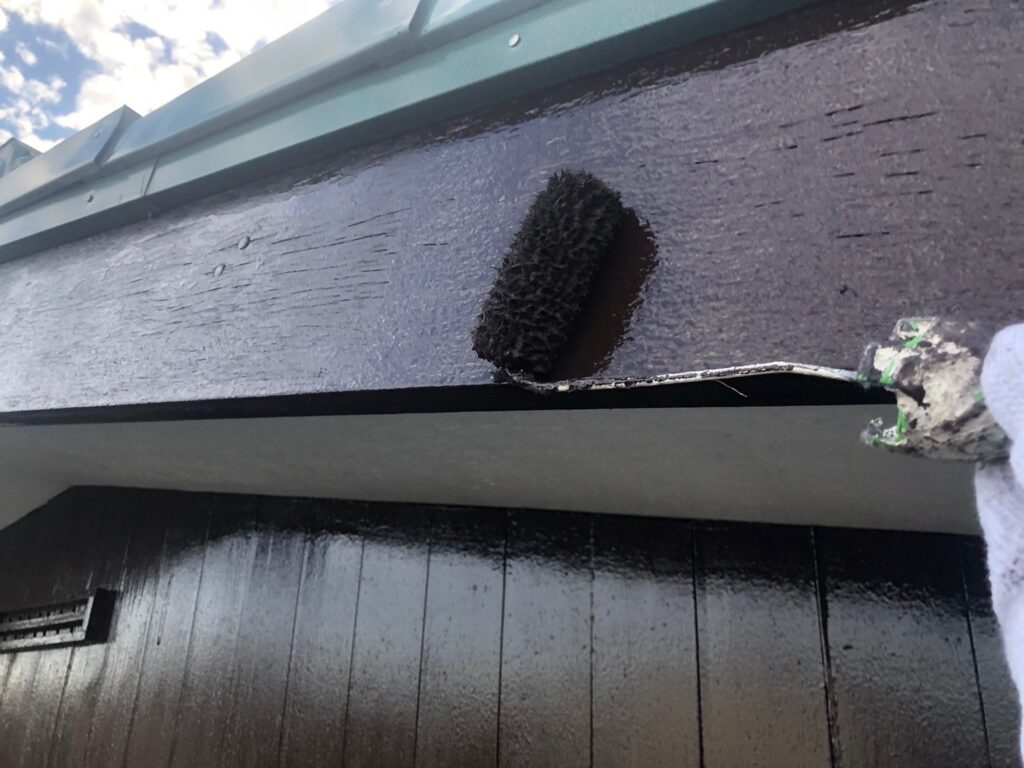
Next, we proceed to the top coat.
Similarly to the previous steps, just applying two coats will not eliminate unevenness, so we will apply this top coat evenly without any patches.
Once the top coat is complete, the work is finished!
Metal Sheet and Metal Painting Method
【Surface Preparation】
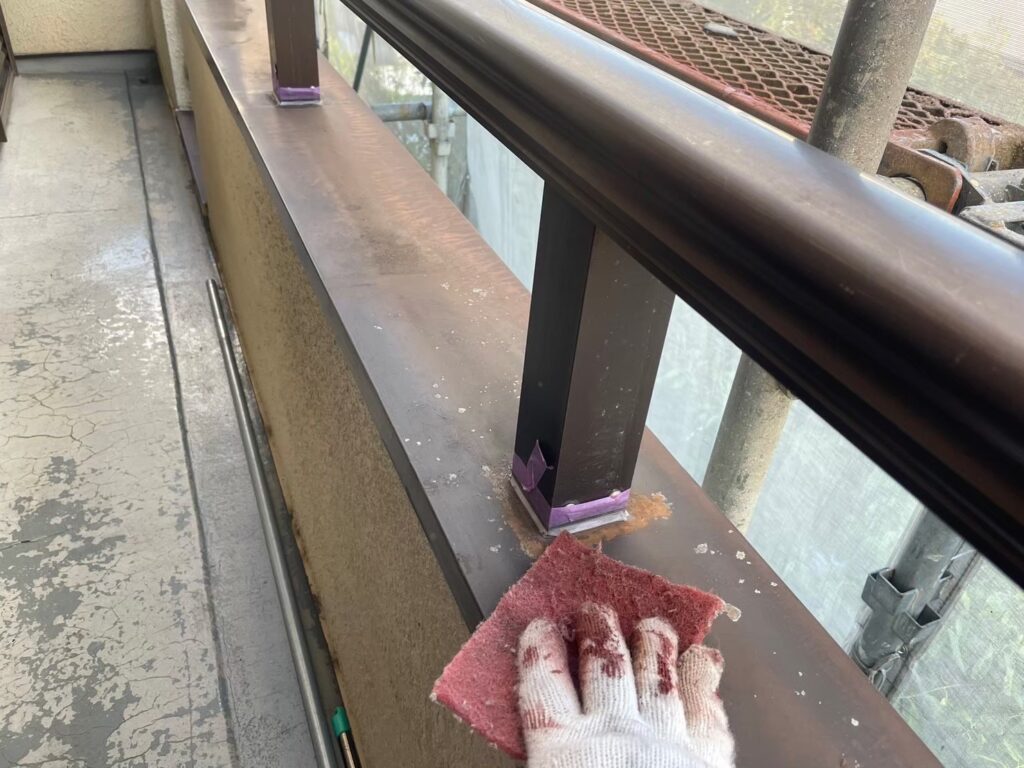
For metal components like sheet metal, we start by removing rust through surface preparation.
If we paint over rust, it will spread underneath, leading to peeling of the paint film and worsening of rust corrosion, so we handle it carefully!
【Rust Prevention】
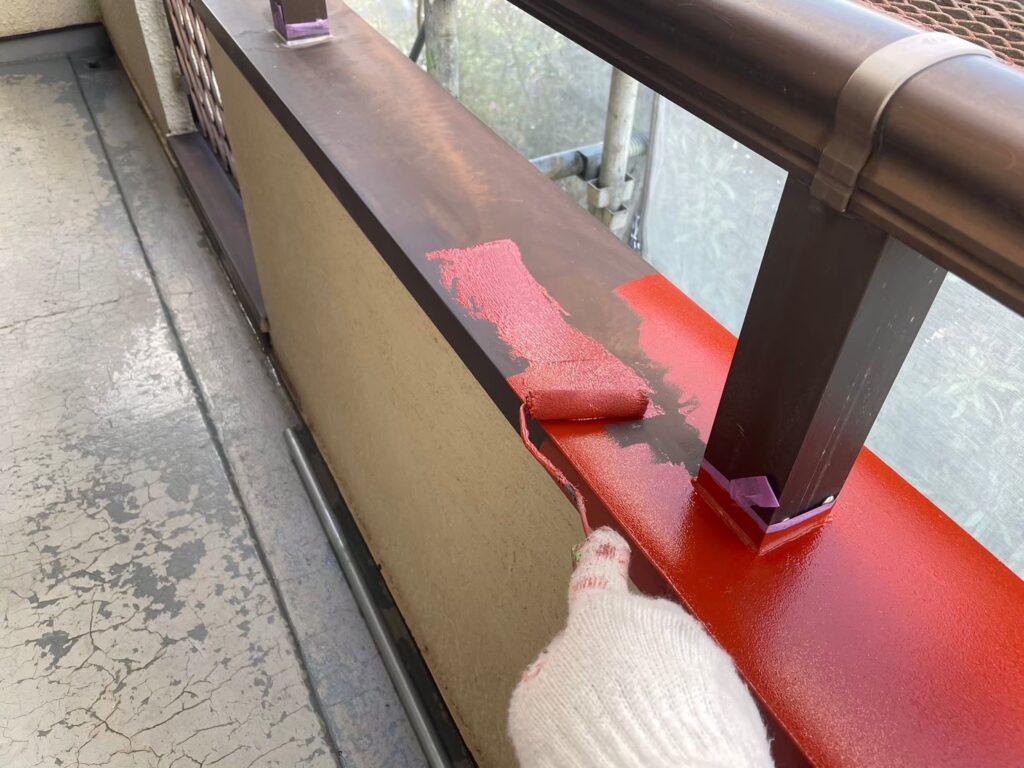
Next, we apply rust prevention! This is used as a primer to prevent corrosion from rainwater and other sources!
【Top Coat 1st Application】
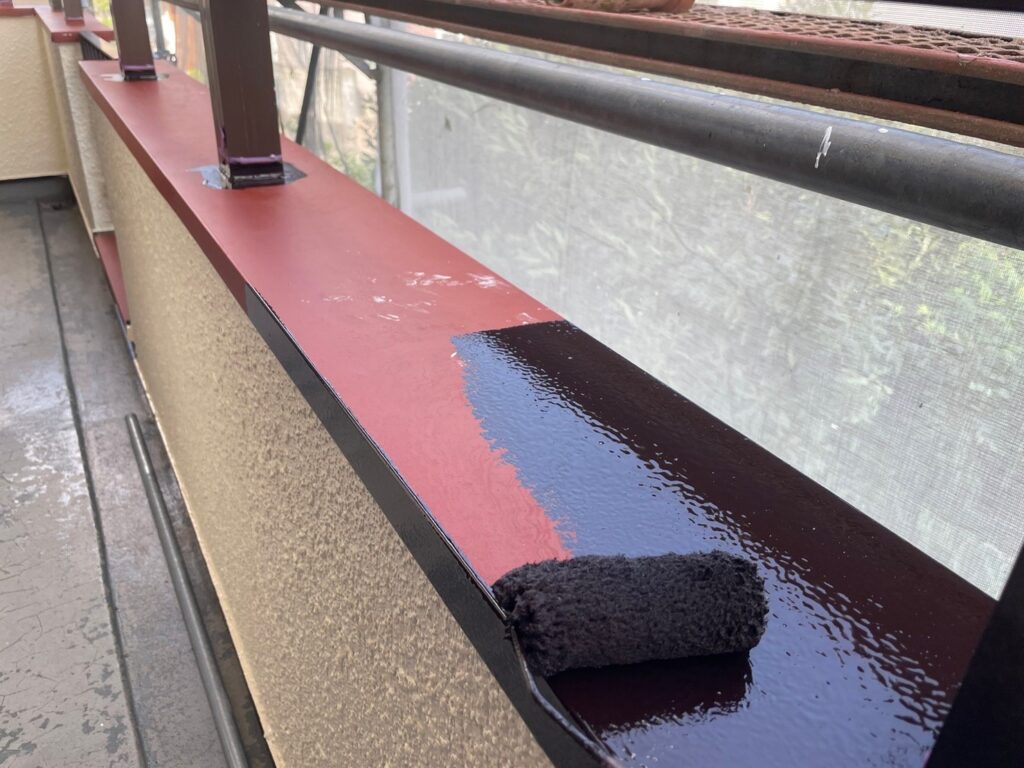
Next is the first application of the top coat after the rust prevention.
【Top Coat 2nd Application】
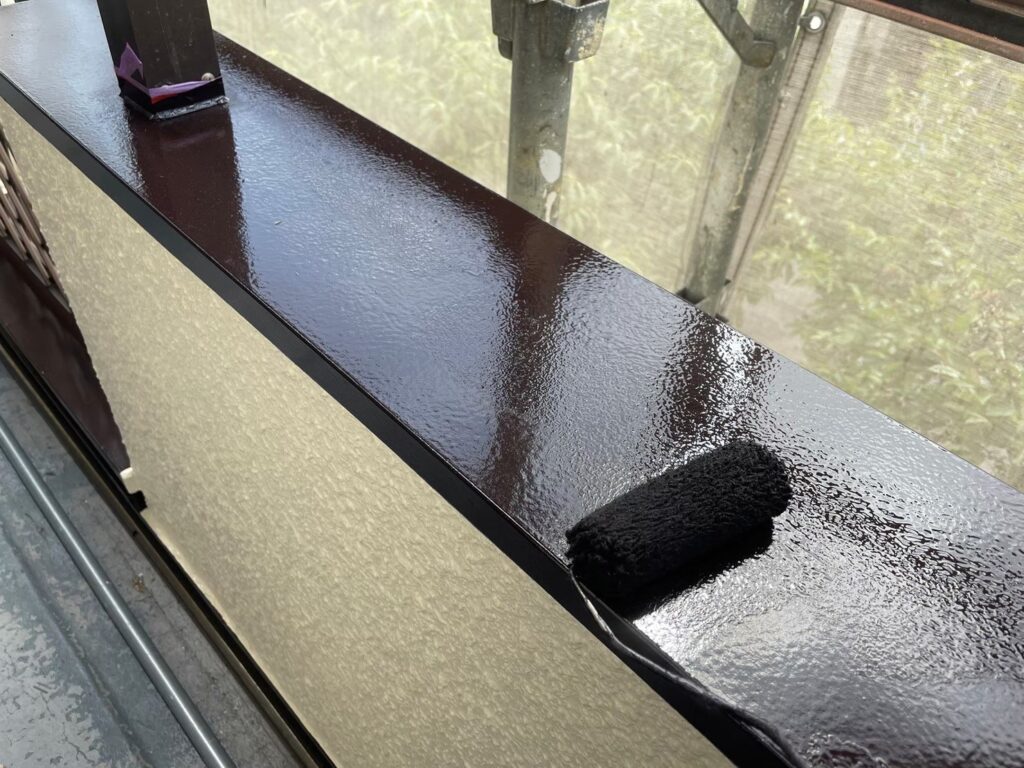
Finally, here is the second coat applied on the second day. Just like with other auxiliary parts, a single coat will result in unevenness and won’t finish nicely, so we will apply the second coat evenly without any patches.
For auxiliary part painting, two coats are standard, but some contractors may finish with just one coat, so be sure to confirm this thoroughly when requesting a quote or before the work begins!
Timing for Auxiliary Part Painting
The timing for auxiliary part painting varies depending on the building materials and climate conditions, but general guidelines are as follows:
-
Regular Inspections: Regularly inspect the auxiliary parts of the building to check for deterioration or damage. Wood, in particular, is vulnerable to moisture and UV rays, so frequent inspections are necessary.
-
Changes in Appearance: If there are noticeable changes in the building’s appearance, this should be seen as a sign of deterioration. If you see peeling paint, discoloration, or cracks, it may be time to consider repainting.
-
Climate Conditions: The necessity for painting can also change based on climate conditions. Areas affected by rain or UV rays may require painting sooner.
-
Age of the Building: The age of the building should also be taken into account. Older buildings tend to deteriorate more easily, making regular painting important.
Cost Estimates for Auxiliary Part Painting
This is a general cost estimate for when performing exterior wall painting.
You can think of the overall cost as exterior wall painting plus auxiliary part painting.
| Accessory parts | Cost Estimates |
| Eaves and fascia | ¥800~¥1000/㎡ |
| Rain gutters | ¥800~¥1000/m |
| Soffit | ¥1000~¥1500/㎡ |
| Vent hood and drip edge | ¥800~¥1000/㎡ |
| Kirioke and awning | ¥800~¥1000/㎡ |
| Wood deck | ¥800~¥1000/㎡ |
| Storm shutters and shutters | ¥800~¥1000/㎡ |
Note⚠︎The table above represents market prices and should be used as a reference!
Points to Consider for Accessory Painting
There are several points to keep in mind when considering accessory painting. First, it is important to choose the appropriate paint according to the material. Selecting paint suitable for materials such as wood, metal, and plastic can enhance durability and aesthetics.
Additionally, if there are signs of deterioration or damage, early repair and painting are necessary. If left unattended, repairs can become difficult and costs may escalate.
Finally, we recommend hiring a professional contractor for painting work. Professional contractors possess the right materials and techniques, ensuring safe and effective work. They often provide warranties and after-sales services, allowing you to trust them with your project.
Summary
We have provided detailed information about accessory painting.
Accessory painting is important not only for maintaining the aesthetics of the building but also for enhancing durability. While it is possible to do the accessory painting yourself to save costs, it is essential to be aware of the points to consider.
Moreover, the cost of accessory painting varies depending on the materials used and the painting area. Therefore, it is advisable to research the market prices for accessory painting in advance to keep costs down.
Furthermore, it is important to know the types of paint and painting methods used as points to consider for accessory painting. By understanding these points, you can use paint that lasts longer.
Additionally, while considering doing the painting yourself to reduce costs, it is necessary to keep the points to consider in mind. Therefore, it is crucial to have a solid understanding of the costs and considerations related to accessory painting.
When painting the exterior walls, we recommend paying attention to the accessories and performing the necessary painting. For inquiries or estimates, please feel free to contact Kakeru Koumuten Co., Ltd.. We are here to assist you!
Estimates and inspections are, of course, free! If you have any concerns regarding roofs, rain gutters, exterior walls, or exteriors, please consult Kakeru Koumuten Co., Ltd.!
We conduct everything from temporary scaffolding work to roof construction and exterior painting entirely in-house. We are confident that we will not be outdone in terms of cost, quality, and efficiency compared to other companies!
We welcome competitive estimates with confidence!
You will be glad you chose us! We take every request seriously to ensure your satisfaction.
We look forward to your inquiries. Thank you very much.
Helpful information about exterior renovations can be found here!
・Summary of Popular Exterior Wall Paint Colors! Recommended Color Combinations!
・A Must-See for Those Wanting to DIY Roof and Exterior Wall Painting! Scaffolding Only! DIY Plan for Roof and Exterior Wall Painting!
・Subsidies in Kanagawa Prefecture! Information on Grants and Reduction Systems!
・Is Exterior Wall Painting Necessary? Risks of Ignoring It!
・How Much Does Exterior Wall Painting Cost? Tips to Reduce Costs!
・When is the Best Time for Exterior Wall Painting? How to Determine the Best Timing!
・What are the Market Prices for Rain Gutter Repair and Cleaning? Tips on Timing and Choosing Contractors!
・What are the Ventilation Methods for Siding External Walls and Direct Installation Methods? Maintenance Methods Explained!
・About Joint and Sealing Work | Information on Cost Estimates and Construction Methods!
LINE consultations are also very welcome◎

We are also updating our Instagram regularly◎ Please follow us, thank you◎

contact Kakeru Koumuten Co., Ltd.
Kakeru Koumuten is a young company whose team is, on average, in their late twenties, but our skills are second to none.
Our greatest strength is that we handle scaffolding, roofing and painting entirely in-house. In an industry where these tasks are usually divided among contractors, our complete service simplifies project management and helps keep costs down. Above all, if a problem arises, we respond promptly.
We proudly describe ourselves as the youngest and most helpful renovation company in Kanagawa!